As a Rhodes user, I know how depressing it can be when your favorite boots start to crack, and you are not ready to throw them yet! You just want to restore them back to life, right?
Look no further! This article will guide you through the process of repairing cracked boots.
So, stay till the end, find out about amazing techniques, and save your leather boots from cracks.
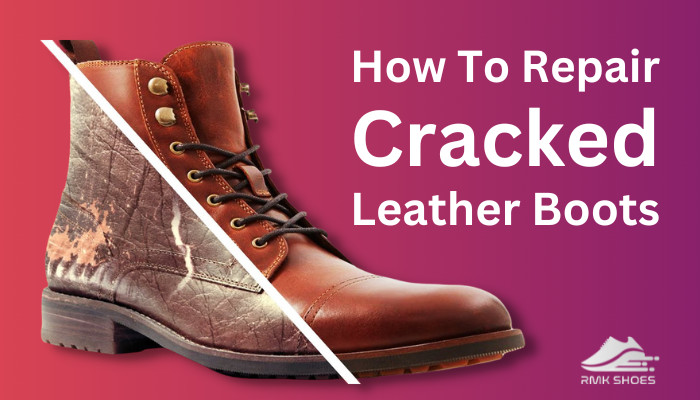
How To Repair Cracked Leather Boots?
Doesn’t matter if you are going to do real work outside or just simply walk around the neighborhood, boots make sure to get you there. But with their tendency to crease, leather boots might dry out with time and get cracked.
However, with some quick steps, you can easily restore them.
To begin with the process, first, you need to check the boots to determine how deep the cracks are.
If you find light surface cracks, fixing that will be buttery smooth. But, when they are the deeper ones, it will be hard to handle, but worry not, I am here to rescue you from that as well, so, just tag along.
Repair Light Leather Cracks: 3 Easy Steps
You can easily get rid of light cracks in leather boots by applying a strong conditioner or cream. Conditioning will restore the moisture while making them more supple.
Here are the steps to repair light cracks in leather boots:
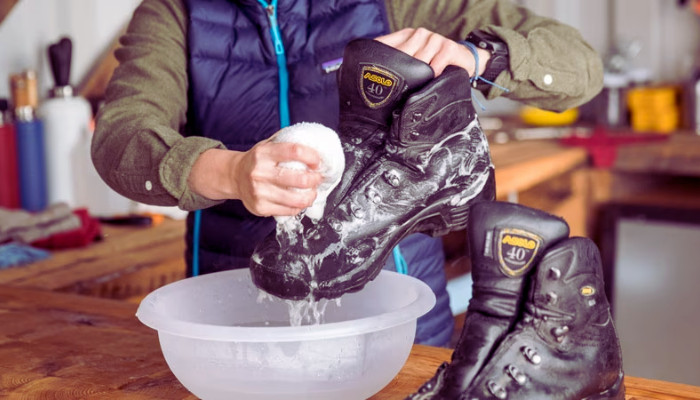
Step 1: Clean Your Boots Properly
The first step is to clean the leather surface to remove any dirt or debris on them. Use a clean damp cloth to wipe down the surface while cleaning.
You can heat them up for around 1 minute, using a hair dryer, before starting. It’ll soften the cracked lines, making it easier to clean.
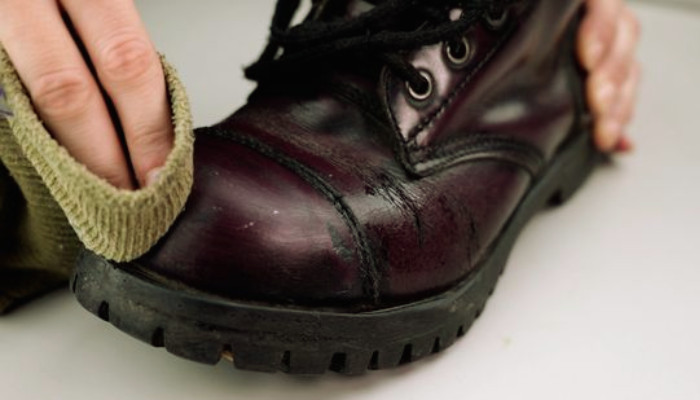
If your boots are too dirty to clean simply with a cloth, use a mixture of soap and water or a leather cleaner instead.
Soak the cloth in soapy water and then wipe the surfaces with a piece of cloth or a soft-bristled brush.
Step 2: Apply The Conditioner
First of all, stuff your boots with a dry old towel or newspaper to keep them in shape.
Then choose a strong conditioner or cream to apply. After trying it on a small area, use a sponge to dab the product on the surface.
And now continue to smoothen it so that the conditioner goes deep inside the fabric while filling in the tiny cracks.

Do the smoothening a couple more times until the scuffs and creasing lines are completely gone.
And now comes the drying. Let the boots dry for several hours, preferably 10–12 hours. Drying allows the product to set on the leather and restore its previous look.
Step 3: Re-Apply The Conditioner
Re-apply the conditioner again if the surface still looks dehydrated. But for this time, the application has to be in a thinner layer than the previous one.
Now, let’s head over and see how to repair the deep cracks in leather boots, you will be astonished by the process!
Repair Deep Leather Cracks
Conditioner alone won’t be enough if your leather boots are deeply cracked. But it can be treated with strong filler or scrapper.
Here are the steps to repair deep cracks in leather boots:
Step 1: Clean the Boots
Using either a brush or a wet cloth, clean the surface of the boots thoroughly while giving more attention to the cracks. And also make sure no dirt or mildew is left on the gaps.
You can use soapy water, saddle soap, or leather cleaner for this purpose.
Step 2: Sand the Leather Surface
The cracked surface needs to be smoothed up a bit. For this, gently rub the leather surface with a fine sandpaper until it looks smooth.
Additionally, getting creases out from your boots can give them an extra shine.
Step 3: Apply A Leather Dye
Often the inner part of the cracks is lighter than the surface color. You need to use a leather dye to make up the contrast.
First, select a dye that is a perfect match for the color of your boots. Apply the dye thoroughly over the cracks using an applicator pad or a sponge. Never use a brush to apply as it may leave awful streaks.
If you have the full kit, make a blend using the tint and the base color. Then apply the combo to the leather surface. Afterward, spread the dye properly for even distribution and wait until it dries up completely.
Step 4: Apply a leather filler
After using a dye, you need to apply a suitable leather filler or sealer to fix deep splits. Leather filler is a putty-like substance that is used to fill in cracks.
Therefore, try to choose a heavy one like filler cream while treating extreme cracks. With a palette knife, carefully apply the filler over the cracks and continue until the gaps are completely filled.
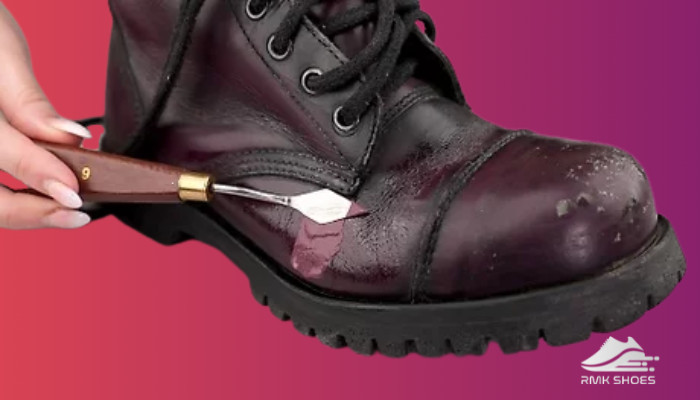
Then smooth it out using a spatula or the same knife. For a perfect result, reapply the filler and smooth it out again.
After that, allow the filler to dry for at least six hours in a well-ventilated area. And sand it down to match the surface of the leather.
Step 5: Apply More Dye And Condition It
If you still inspect any color contrast, a little more dying will resolve it.
For a perfect and smooth finish, wipe the treated leather surface using a suitable conditioner. This will not only give the shoes a sleek look but also will counter further cracking.
By following these easy steps, you can repair your cracked leather boot and keep them new for the years to come.
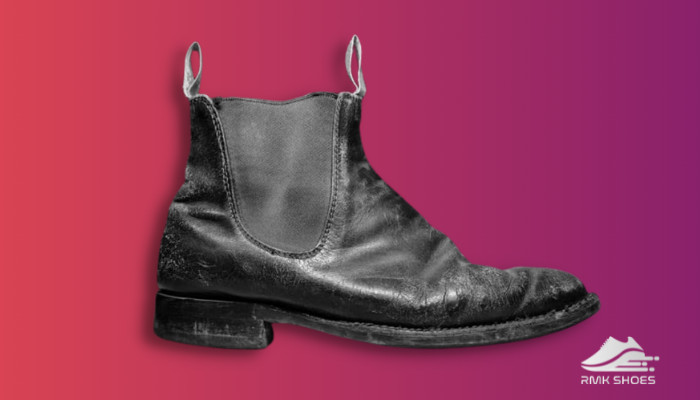
What Causes Leather Boots To Crack?
As I’ve said before, boots made of leather are prone to get creased and eventually cracked with aging. Leather naturally cracks over time as they are made of animal skins.
However, your cherished boots may get scuffed or cracked for a couple of reasons, and they are-
- Exposure to moisture: If you leave your leather boots wet for a long time, they can stretch up and eventually get cracked. So, it is important to keep your leather boots away from water, if they are not waterproof.
- Exposure to heat or cold: One of the most common reasons for leather boots to crack is their exposure to extreme heat or cold. In such conditions, the leather surface dries up and gets stretched and distorted, leading to crack formation.
More on the topic, can you wear your favorite boots during the rain? Surely, knowing the answer to that can save your loved pair!
- Improper cleaning: Another reason for cracking is if you don’t clean your boots periodically or when you use a harsh chemical or soap for cleaning. This will dry out the leather and form cracks.
- Poor quality leather: Leather boots can crack due to the use of poor quality or thin leather.
When the leather is lower in quality, it is more susceptible to cracking than the good one.
And if your boot is made of thin leather, it will be more prone to cracking under normal pressure or use.
Overall, all the above reasons can end up cracking your leather boots and ruining their classy appearance.
How Can You Prevent Your Leather Boots From Cracking?
Though leather boots are durable and classy, they do need proper care to prevent creasing and cracking. You don’t have to bother repairing them if you can counter the cracking by following some easy ways.
Here are the techniques you can follow to avoid cracks in your leather boots:
- The first thing you need to do is store them properly in a dry and well-ventilated space. Keep your leather shoes away from humid and damp places, as water can cause them to mold or mildew. You can use some waterproofing spray or wax as well.
- Stuff your boots with old newspapers or shoe trees when you are not wearing them. This will help to retain them in shape and prevent creasing.
- You need to clean them regularly with a mild soap or leather cleaner specifically made for cleaning leather shoes. Avoid any harsh chemicals or abrasives as they can cause cracking.
- Additionally, you need to take good care of your leather boots to retain their glossy look. Use a good quality conditioner or mink oil from time to time to keep the leather supple and moisturized.
- Don’t wear the shoes in extreme temperatures or harsh weather conditions to prevent drying.
Also, avoid using the same boots every day. They need time between wears so that they can rest and dry out. Don’t overuse your boots and keep wearing them in rotation.
By following these techniques, you can prevent your favorite leather boots from cracking and keep their aesthetic look. Also, you can save your leather boots from calamities if you know the ways to seal those boots and lighten their colors.
Final Words
A leather boot is a stylish and durable footwear option for any shoe enthusiast. But your loved boots can also lose their elegance through creasing and cracking.
Nonetheless, properly following this article will do miracles on your cracked boots and make them new again!
Leave a comment here and let me know if you need more information on leather boots.