Shoes featuring white soles are such eye candies! On the one hand, they’ll upgrade almost any of your attires, while on the other, you’ll have to deal with the dirt and the yellowing soles.
Don’t worry! I’ve got your back. After thorough research and proper testing, I came up with this guide to make your life a whole lot easier.
I’ll explain some convenient methods that will whiten your yellowed soles in an instant. So, do read carefully.
Cleaning Yellow Soles With Baking Soda
Cleaning yellow soles with the help of baking soda is a widely used technique. It’s an effective method, and some of the other ingredients required are readily available. However, there are two ways to clean the yellow sole with baking soda.
First, with the fusion of hydrogen peroxide, and secondly, without the incorporation of hydrogen peroxide.
First of all, I’ll explain the technique of cleaning yellowed soles using baking without including hydrogen peroxide and secondly with hydrogen peroxide. After these two, there are few other ways of doing this particular job. So, without further ado, let’s get started.
Check out my new post on how to Clean Faux Suede Shoes.
Whiten Yellowed Soles Using The Following Methods
White soles turn yellow due to a variety of reasons. But there’s no need to worry. If there’s a problem, there’s a solution. For your convenience, I’ve listed some of the easiest methods for whitening yellow soles.
1. Clean Yellow Sole Using Baking Soda (Without Hydrogen Peroxide)

As mentioned earlier, there are two ways of using baking soda; one involves hydrogen peroxide, and the other doesn’t. This method doesn’t include the use of hydrogen peroxide. Let’s take a look at the different requirements and steps you’ll need to follow.
Requirement :
- Baking soda
- Laundry detergent
- A small bowl
- Water
- Toothpaste
- Tooth Brush
- A clean, dry rag
Here are the steps you’ll need to follow:
- Take two tablespoons of baking soda and four tablespoons of detergent in a small bowl. Mix the ingredients thoroughly. Now, add water drop by drop and form a loose and fine paste.
- Now, add toothpaste to the mixture you’ve just formed. 10-12 grams of toothpaste should be enough. Once again, mix everything thoroughly. You can stop mixing once you get a fine consistency.
- Now that the mixture’s complete, brush off the sole with the used toothbrush to clear off unnecessary dirt or dust.
- Clean the bristles in running tap water. Once done, dip the brush in the mixture and apply it to the soles carefully. Try to be generous with the portion.
- Now that you’ve applied the mixture, allow it to dry onto the sole. Try to do the drying process in a dust-free area.
- As the mixture has dried off completely, clean off the paste by rinsing water slowly. You can use a wet toothbrush to clean off the dried paste as well.
- Now that you’ve cleaned the paste thoroughly, soak up any excess moisture using a clean, dry rag.
Protip: In this method, precision is a crucial factor. Try to be precise in every step possible, especially when applying the paste. Try not to use the paste anywhere other than the sole or any part that’s white.
But before that, you check out how to clean and Care Your Clark Desert Boots?
2. Clean Yellow Soles Using Baking Soda (with Hydrogen Peroxide)
Hydrogen Peroxide may sound quite fancy and rare, but trust me, there’s no need to worry. You can quickly get it from your local chemist. Now that’s out of the way, let’s focus on the steps to be taken.
Requirement:
- Hydrogen peroxide
- Baking Soda
- Used brush
- A small bowl
- Scrubber
- Warm water
- Toothpaste (optional)
Here are the steps to follow:
- Mix four tablespoons of laundry detergent and 20-22 ml of hydrogen peroxide in a small bowl thoroughly.
- Add a small amount of toothpaste if you find the mixture too thin. Mix all the ingredients thoroughly and make a fine paste.
- Take the used toothbrush and clean off any excess dust. Now wash that brush clean and apply the paste to the yellowed sole.
- Take a plastic bag and cover the shoes for 30 minutes. Putting the shoes in the plastic bag reduces the chance of any kind of oxidation taking place on the sole surface.
- Now, put the soles in warm water for around half an hour. Once the majority of the paste is washed off, take the scrubber and clean off the remaining paste.
- Once the paste is completely clean, soak up excess moisture and leave your shoes to completely dry.
Protip: Using toothpaste in this method is optional. If You find the mixture of hydrogen peroxide and baking soda to be inconsistent, add the toothpaste. One more thing! Dry your shoes in a dust-free area
Follow our guide to know Clean White Mesh Shoes.
3. Whiten Yellow soles With Bleach
Bleach is a powerful cleaning agent and is widely used to clean a variety of stuff. I’ll tell you the proper way to use bleach and a few other ingredients to clean yellowed shoe soles.
Requirement:
- Bleach
- Toothbrush
- Water
- Small bowl
Here are the steps you should follow to get the best result:
- In a small bowl, mix equal portions of bleach and water.
- Use the toothbrush to clean off excess dirt or dust. Once done, clean the brush in running tap water.
- Dip the brush in the mixture and apply it all over the yellow sole. Once done, scrub the sole using the toothbrush or a clean cloth.
- Let the soles rest for about 30 minutes. Once done, rinse the soles clean with warm water and let them dry.
Protip: If you’re not satisfied with the first attempt, repeat the steps for better results. Be careful and precise while applying the mixture. Make sure it doesn’t touch any other surface of the shoe.
3. Brush Clean Yellow Soles With Toothpaste
My personal favorite. It requires little to no effort at all, and all the other equipment you’ll need is right there in your home. Let’s focus on the procedures then.
Requirements:
- Used toothbrush
- Toothpaste
- Water
- A clean, dry rag
Here are the following steps you should carry out:
- Clear off excess dust using the toothbrush, then sparkle a few drops of water on the sole.
- Clean the brush in running tap water. Once done, apply toothpaste all over the sole and scrub thoroughly all over the sole.
- Take the clean, dry rag and wipe off all the foams of the sole.
- If you’re not satisfied initially, don’t hesitate to repeat the procedure all over again. And frankly speaking, repenting the process should be the standard routine as I’ve always found better results when doing it twice.
Protip: Maintain utmost precision while scrubbing the soles. I’m sure you don’t want any white marks from the toothpaste by cleaning your shoe’s upper.
Check out the easiest way to clean and Care Your Clark Desert Boots.
How Can You Restore Icy Soles?
Icy soles are blue-tinted shoe soles that are more immune to yellowing compared to regular white soles. While traditional clear soles can yellow quickly, icy soles lengthen the soles’ lifespan and maintain that white glow for a longer time.
However, they do become yellow after a specific time and need to be whitened. You’ll just need to get yourself a re-icing agent.
Sea glow or Island Girl Pink is a famous de-icing agent available in the market. Let’s have a look at how you can restore yellowed white soles.
Requirements:
- Re-icing agent
- Toothbrush or paper towel
- Non-abrasive scrubbing Pad
Here are the practical steps you need to follow to restore icy soles:
- Take a toothbrush or paper towel to clean any excess dust. If you’re using a toothbrush, wash it in running tap water. If possible, using a toothbrush as a paper towel tends to leave paper residues on the surface.
- Now! Apply the re-icing agent on the soles. Be very careful, and don’t let the re-icing agent touch the glue seams. The re-icing agent can quickly react with the glue to dissolve them, which will detach the sole from the shoe.
- Now that you’ve applied the re-icing agent, Keep shoes aside for a couple of minutes.
- Now, take the scrubbing pad and gently rub the soles. Rubbing the soles allows the re-icing agent to penetrate the soles to cleanse them more effectively.
- Repeat the previous steps to prevent oxidation on the surface of the sole.
- Sundry the soles in the blazing sunlight. Sunlight acts as a catalyst to allow the re-icing agent to penetrate deeper into the sole. Keep them in the sunlight for about 30 minutes.
- Take clean water in a bowl, soak a clean toothbrush or scrubber and gently remove the re-icing agent. Sift through the soles and remove any excess residue from the sole surface.
Protip: The temperature outside should not be more than 32℃ (90℉). The weather of more than 49℃ (120℉) can cause irreparable damage. You can wrap the shoes in plastic bags a few times to control the temperature or cover the sides or top with cardboard before exposing the soles out in the sun.
How Can You Prevent The Yellowing of Soles Frequently?
There are some techniques you can use that will slow down the yellowing of soles quickly. It’s a matter of practice. The regular you are, the cleaner your while soles. Let’s take a look at some widely used methods.
1. Using Pencil Eraser to Clean White Soles
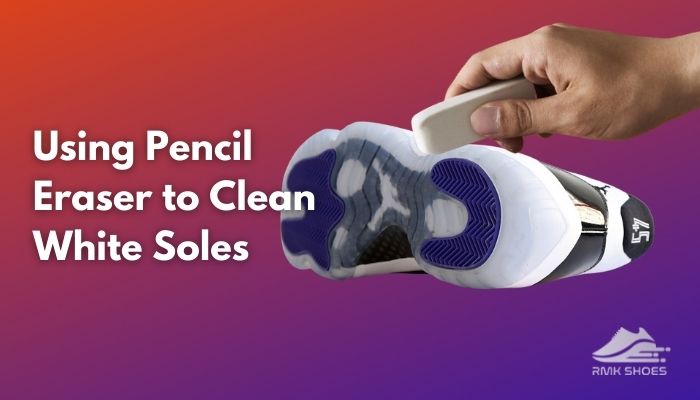
You can regularly use a pencil eraser to clean off any small stain, dirt spots, or other small dirtying factors that accumulate to fasten the yellowing process. Just purchase white art erases and clean your soles regularly, especially when you return home after a long day of activity.
2. keep The Shoes In The Original Box
Storing the shoes in their original box ensures safe and controlled storage. You can maintain their aesthetic by keeping them in the original box and not inside a closet, drawer, or shoe rack.
All you have to do is remove the original paper and replace it with non-acidic paper. The original paper has dyes that contain chemicals that escalate the yellowing process.
But before that, go through our epic guide on how to clean HOKA Shoes?
3. Use Silica Packs While Storing
Silica packs are handy when it comes to drying out small spaces. This is why you’ll see them in quite a few places like coffee jars or tortilla chip packs. Their primary job’s keeping any area moist free. All you have to do is drop a pack of silica in each of your shoes while storing them.
Silica slows down the yellowing process while your shoes are in storage. You can put four packs of silica in a shoebox. Anything more is simply not recommended.
4. Avoid Wearing Your Shoes In The Dirt
Dirt, grass, rain or rocks, and white soles are simply not the best of friends. If you’ve another pair that you don’t mind getting dirty, you might as well wear them. You can avoid oxidation (the process by which materials degrade) by avoiding these kinds of conditions, more specifically moisture.
Final Thoughts
Shoes with white soles are quite a practical fashion accessory. They can quickly galvanize any outfit and make you look great, but there’s one fact you’ll have to live with! And that’s white shoe soles will turn yellow after a specific time. There’s no permanent solution to prevent this process.
However, you can always clean your soles to make them white again, or you can follow some techniques that prevent white soles from turning yellow quickly.
I’ve explained everything there is about cleaning yellow soles. If you have the slightest of confusion, feel free to drop it down in the comment section below. I’ll be more than happy to assist you.