Did you ever accidentally poke a hole into your rain boots, completely ruining their purpose? If yes, you are not the only one, most of us have been in that situation.
So, Can Rain Boots Be Repaired?

Does it sound complicated? Don’t worry, I have broken the process down for you in a step by step guide, and included all the details that you might need when fixing your rain boots.
Just keep reading till the end to repair your rain boots at home, all by yourself.
How To Fix Your Rain Boots
Like everyone else, you probably also wear your rain boots in harsh conditions – whether it’s in the heavy rains or working in your yard dealing with piles of compost.
So, it’s safe to say that these rubber boots are surely a very important companion.
However, wearing them in such harsh conditions, getting your boots damaged is not uncommon. But they can surely be repaired.
Below I have mentioned a step by step guide to help you repair your rain boot at home.
Also, read Do Hunter Rain Boots Run Big.
Items Needed
Before I guide you through the steps, it’s important that you collect all the necessary tools to carry out this repair.
And don’t stress out because these are some very regular tools that you probably have lying around your house. If not, you can easily find them at your nearest convenience store.
The items needed are as follows:
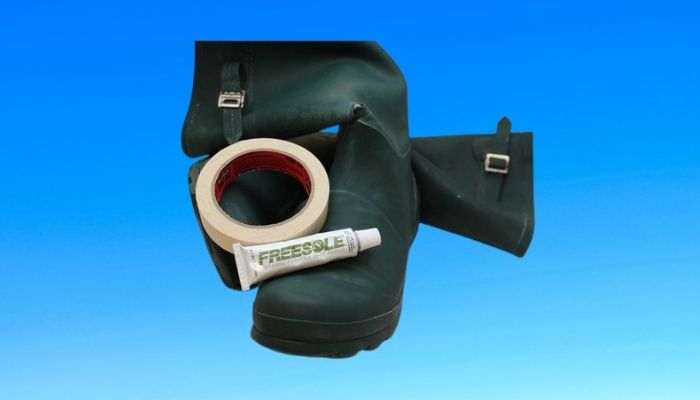
- A strong shoe adhesive
- Duct tape
- Pencil
- An old brush
- Sand paper
- Last but not the least, your loved companion – the rain boots that need fixing
Check out our separate post to know Are Duck Boots Rain Boots.
Steps For Repairing Cracks Or Small Holes
First and foremost, you need to ensure that your rubber boots are fully clean. So, before you start with the repair, properly wash them with warm soapy water to clean them. Then dry your rain boots.
Once they are dry, take the pencil and draw an outline around the crack or small holes on your rubber rain boots.
Now take the duct tape and carefully place it over the outline done with the pencil, surrounding the crack you are willing to fix.
Next, take the sandpaper and sand down the area enclosed within the duct tape.
This is an optional step, but if you perform this step the texture of the damaged area will increase and the adhesive or sealant will adhere better to that area.
Now is the time to use the silicone sealant. Take the glue and squirt the adhesive over the damaged area.
Using the brush, spread the glue over the area to be repaired in such a way that it forms a thick layer over the zone.
Once the layer has been spread, immediately remove the surrounding tape so that it does not get stuck to the boot and glue.
After performing all these steps the waiting period starts – leave your boots out to dry for at least 48 hours before you start using them again.
Read more on how to Stop Rubber Rain Boots From Squeaking.
Steps For Repairing Larger Holes
Repairing larger holes is a bit more complex than repairing small holes, cracks, or rips. In order to fix large holes, you will need a rubber boot repair kit.
Each kit comes with a list of instructions on how to use the kit, so I highly recommend you go through the instructions before you start repairing your rain boots.

Check out our separate post: Do You Wear Socks with Rain Boots.
There are two ways that these tools work:
- Stick-on patches: Some of the repair kits come with stick-on patches. All you have to do is cut out the patch according to the size of the hole and carefully place it over the damaged area. After that simply wait for the glue to dry, the time of dying will be as per the instructions, so make sure you wait accordingly.
- Adhesive and patch: While some contain stick-on patches, others contain the pack and the adhesive separately. In that case, you will have to apply an even, thick layer of the provided glue over the damaged portion, then gently place the patch over the glue. Make sure that you smooth out any wrinkles which may have formed while you were placing the patch. Apply some pressure to ensure that the patc has fully stuck to the glue. Then wait for approximately 48 hours, and you are good to go!
Additional Tip One: Once the glue has dried, you can fill up your rain boots with water to check for any leaks or damaged areas left untreated. Once it is checked and the boots have been repaired, you are good to go.
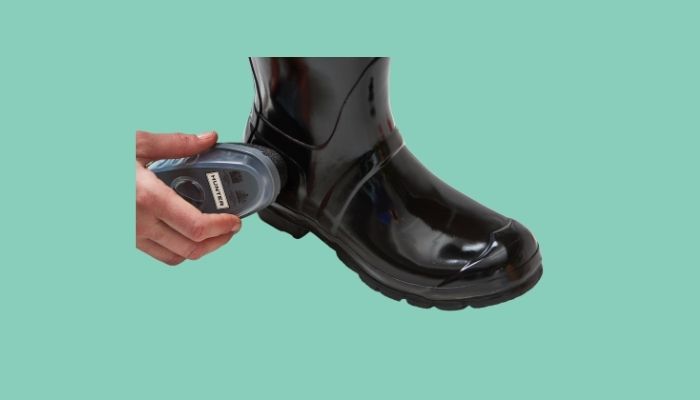
Additional Tip Two: Taking care of your rain boots is important. The way they protect you, you must also take care of them in order to increase their longevity. How? Simply by washing them after a wear, drying them out, and applying boot conditioner/treatments using an applicator.
Follow our guide to know Are Rain Boots Slip Resistant.
When To Get Professional Repairs
The rips and cracks are not always within your repairing capacity, sometimes the severity is beyond fixing.
In those cases, it is best to take your rain boots to a cobbler instead of taking things in your own hands. Why? Well, because instead of repairing the shoes you might end up damaging it even further.
To avoid severely damaging the rain boots, it is best to take them to the cobbler for repairs.
Besides repairing, they can also alter the size of the rubber boots – turning the smaller or bigger, as per your need. And if they are too worn out, the cobbler can turn them into brand new-looking rain boots!
Yes, it is a more expensive alternative, but it sure is worth it. Especially if your boots are expensive themselves, getting them repaired by professionals is the best option in my opinion.
Conclusion
Fixing a pair of cracked or punctured rain boots is not too difficult, especially if you have the correct tools – then you can easily repair your rain boots at home, all by yourself.
However, sometimes, depending on the severity of the damage, repairing them is not as easy as it would be otherwise.
No need to worry, because even if you cannot fix them on your own, you can surely take them to the cobbler to get them repaired professionally for a better finish and your rain boots will look good as new.
But one thing I must include is, if your rain boots are severely damaged or ragged, it is best to get yourself a new pair instead of trying to fix it personally or professionally as it may not be sustainable and you will probably need to get it fixed again, sooner than later.
With all that being said, I hope this article has helped you and you know how to get the little holes and cracks on your rain boots on your own.
If you try out this tutorial, do let me know your experience. And if you have any other techniques of fixing your rain boots, do not forget to share them with me in the comment section below.