I know how embarrassing it is to slip shoes on in a public place. It is not only awkward but also dangerous as it can cause serious injuries.
Buying non-slip shoes is not always possible. So the solution is to make your existing pair slip-resistant.
If you search “how you can make your shoes non-slip?” You will find numerous discussions and methods. It will make you confused.
But there is nothing to worry about. I researched a lot and tried all the methods practically to resolve my confusion.
So stick to the end. I am sure you will be able to find your solution to make your shoe non-slippery.
You may also like to read about Are Crocs non slip shoes?
Can You Make Regular Shoes Into Non-Slip Shoes?
It’s not always possible to get a non-slip shoe. It might be out of your budget, or the clits might not suit every situation or place.
For example, you can not wear sports boots while shopping in a mall. The situation becomes more difficult for those living in a rainy or snowy area.
So, the most common solution is to make your regular shoes non-slip.
You might be confused, Is it even possible?
Well, you can actually make your shoes non-slip. There have some beneficial ideas which can make your regular shoes less slippery.
How Can I Make My Shoe Non-Slippery?
Before knowing how to make your shoes, you must know how shoes get smooth or what elements make shoes slippery.
Shoes can be cozy from the beginning or after use. Some boots are slippery by its nature. This instance happened for the material used in those shoes during manufacturing.
On the other hand, your shoes can become slippy by overusing. The outsole will lose its natural grip if you use your shoes for a long time or during a long rough walk. It will become smooth and act more slippery.
So, you have to know the methods for both types of shoes and understand which one is appropriate for you.
Here are the 9 most accessible methods to make shoes non-slip:
1. Scuffing Your Shoes
To scuff your shoes, you can use sandpaper. It is a more permanent solution than any other method. The rough surface of sandpaper will provide more traction to the outsole of your shoes.
To apply sandpaper, you should follow the steps I have listed below:
- Clean your shoes’ outsole first.
- Hold your shoes upside down. You can keep your hand in the shoe to get more support.
- Take a piece of sandpaper.
- Rub the sandpaper on the point where your shoes get touched on the surface until it gets scratchy.
- Apply the same for the next part of the shoe.
Scuffing is more effective for rubber soles.
You can use a nail filler if you don’t have sandpaper. It will give you the same performance. You should apply the same process I discussed above for applying the nail filler.
2. Grip pad
A grip pad is a piece of uneven pad that gets attached under your outsole and provides more traction. A grip pad will protect you on a wet surface too. It is changeable and an extra part of your shoes.
A grip pad is the smartest way to make your shoes non-slip.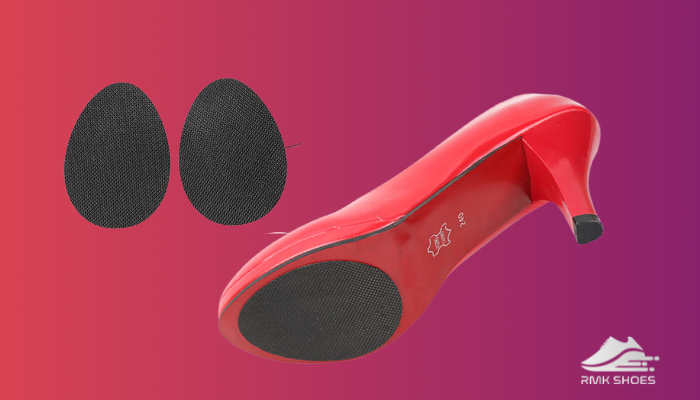
A grip pad is a solution if you want to keep your outsole intact. A small piece of the pad can give you the proper traction if it is attached to the right place of your outsole.
It’s made of rubber. So the sticky nature will provide more grip to your shoes.
If you’re unfamiliar with grip pad, you should follow these steps:
- Clean the outsole of the shoe.
- Apply grip wax evenly on the outsole.
- Attach your grip pad where you need it.
- Rest your pair for around 1 hour.
After one hour, you will be ready to wear your shoes.
Before pursuing this solution, remember that the grip pad is separate from your outsole. So it can be uncomfortable at first. But when you get used to it, you can feel the usefulness of a grip pad.
Besides, it can be a costly solution for you if you are on a budget. You should buy a grip sole according to your shoes. The grip pad might be different for different types of shoes.
So, take a good look before choosing your one.
3. Traction Spray
Traction spray is a product specially made for providing more traction to your outsole. It is a chemical spray that will not resolve in water.
You can walk comfortably on icy surfaces after applying traction spray. Another plus point of using this spray is you don’t need to remove your shoe to apply it.
When you go for terrain which would be wet or icy, you should carry a bottle of traction spray with you.
For applying traction spray, you have followed the steps below:
- Clean your outsole properly.
- Spray a gentle amount of spray on your outsole. Remember, you must spray directly onto the outsole, not anywhere else.
- Let it dry for 2 to 3 hours before further use.
The spray will not work correctly if you do not follow these steps. You might find bubbles on your outsole if the sole is not clean enough.
Traction spry is not expensive, so that you can use them regularly.
However, you should not be careless after applying the spray once. You should keep checking them before going out every time.
4. Bandage
You might be surprised to hear about this solution, but it works.
A pair of adhesive bandages can offer you a quick solution to slippery shoes. You can even carry them in your handbag in case of slippery surfaces or wet plains. When you face such a situation, you can apply them instantly.
Apply one bandage under the front part of your shoes and another for the heel area.
You can also use masking tape for solving slip soles. The sticky nature of masking tape provides more traction to your extra smooth shoes.
5. Puff Paint
Puff paint is an exceptional idea to make your shoe non-slip, which seems strange. But this method really works.
You may know about this kind of painting. The puff paint is the same which used for decorating or adding a 3D effect on any plane.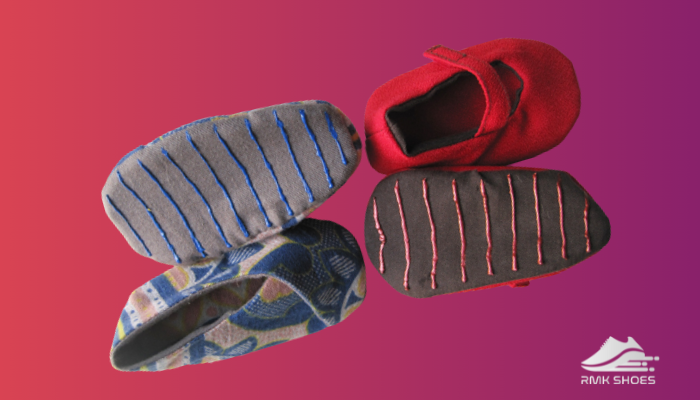
For making and applying puff painting, you should follow these steps:
- Take some pudding mix and yogurt. Mix them well with the help of a spoon.
- Clean the outsole of your shoes.
- Spray one coat of your hair spray. Traction spray can be a substitute for this.
- Let them dry.
- Draw some texture with the puff mixer on the outsole.
- Let them dry till it does not feel sticky.
Puff painting is fun. Besides, it is effective as well to make your shoes less slippery. But you should draw a minimal texture. Otherwise, it might get more slippery than before.
6. Hair Spray
If you are looking for an easy home remedy, hair spray is your solution.
When applying hair spray on your shoes, the chemical of the spray reacts with the surface and makes them tacky. You should clean your shoes before applying hair spray. After using, keep your boots aside for 2 to 3 hours to dry the spray.
Now, I have to warn you that this process can be messy, and the drying time may seem long to you. Also, you can feel uneasy because your soles will get hard after applying the hair spray.
Only use this method when you have nothing to make your shoes non-slip.
7. Salt and Rubber Glue
Salt and rubber glue will be a method to get more traction. The chemical of rubber glue reacts with the salts to make a block of concrete, making the shoe non-slippery.
To apply this method, you can use various methods. You can draw something on the sole with the help of rubber glue and then place the shoes on a layer of salt.
Otherwise, you can mix the gum and salt and then apply this mixture to the front part and the heel part of the shoes.
In these methods, the 1st one is authentic, but I like the second one because it is easy.
8. Scoring The Outsole
Scoring is the ultimate solution that you can apply to your shoes. Scoring your outsole will provide solid traction against a super slippery surface.
You can use a knife or any other sharp object to make a cut on the surface of your sole.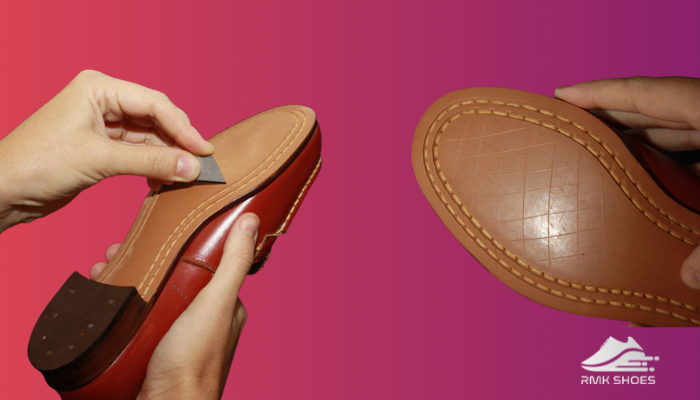
Scoring your outsole will provide an uneven texture, allowing you more grip. You can cut diagonally, horizontally, or spirally on your shoes. If you cut a deep line, you could damage your shoes.
And last but not least you should not cut your new pair. It may be the cause of ruining your shoes permanently.
9. Sand And Rubber Glue
Another way you can try to make your shoe slip-resistant is sand and rubber glue.
I discovered this method after many trials and errors. It is almost similar to the salt and rubber glue technique. You have to use sand instead of salt. Otherwise, the making and the applying process are the same as before.
The rough molecule of sand increases the traction of the sole when mixed with the rubber glue.
As I discussed above, you can select any of these 9 methods to make your shoes non-slip. I tried every one of these and found an effective result for every hack.
How to Make Shoes Non-Slip With Hot Glue?
I’m sure you heard about the method for making shoe slip-resistant. Hot glue is a stick of glue. You need a glue gun to use it. Glue gun is an electric device that melts the glue stick and makes hot glue.
This hot glue is the most used and popular technique to make shoes non-slippery. But there are two kinds of shoes where you can apply hot glue.
The hot glue method is applicable for outdoor boots and athletic boots.
Most outdoor boots are slick and slight. So you cannot follow any cutting method for this kind of shoe. That’s why hot glue is an effective solution.
Athletic boots have more grip than regular boots. The waxy texture of hot glue can add even more grip to athlete boots.
To apply hot glue for more grip, you have to melt them with the help of a glue gun or whatever you prefer. Then apply the glue on the sole where it meets the surfaces. Let your shoes dry before you use them.
You can even fix your minor torn by using hot glue.
Out of all the methods I discussed, the Hot glue gun is the most accessible element in any house. So you can use hot glue without any doubt for your favorite pair in any situation.
How to Make Shoes Non-Slip For Restaurants?
A restaurant is a critical place where you must choose your pair carefully. As a restaurant worker, you have to do various types of work. Sometimes you may work on a watery surface, or sometimes, it could be an oily kitchen floor.
Walking on such surfaces can lead to severe injuries by slipping. Even hot food can drop on you or a customer if you wear slippery shoes while working in a restaurant.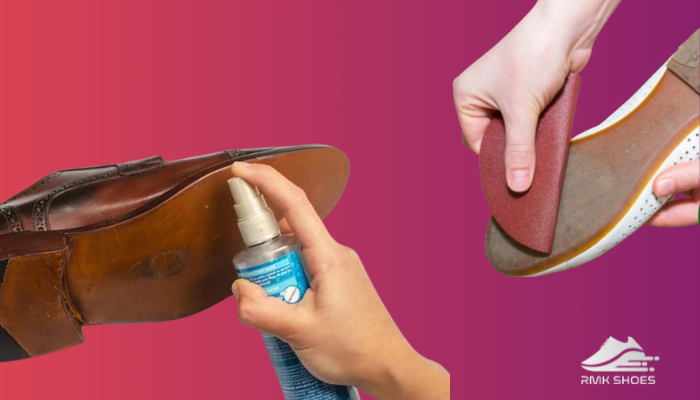
So, you’ll need shoes with proper traction.
But choosing permanent non-slip shoes can’t be a solution to this as it will cost you extra bucks. In some cases, non-slip shoes are not allowed in the corporate area because of their squeaky sound.
So the only way left is to make your regular shoe non-slip.
You can make your shoes slip resistance in two ways. You will either damage your sole to make it nonslip, or you can avoid damaging the sole altogether. I will discuss both methods below.
Here’re the steps of the sole damaging method:
- Scoring your shoes
- Scuffing your shoes.
- Use sandpaper.
- Use metal nail filler.
On the other hand, follow these steps to get more grip without damaging your outsole:
- Use grip pad.
- Apply puff paint.
- Apply hair spray.
- Use adhesive bandage.
- Use traction spray.
- Use hot glue.
- Use ankle straps.
Apart from these methods, you can resole your shoes to get more traction in restaurant use. But, If you decide to resole your shoe, remember that it is not an effective method as it can cost more and you have to go through a long process.
What are the Best Non Slip Sprays For Shoes?
The non-slip spray or Traction Spray is an easy and handy solution to make your shoes non-slippery.
Traction spray reacts with the air after applying it to the outsole, creating a hard and rough surface that helps maintain grip while walking.
There are various kinds of traction spray available in the market. They are different in price but work almost the same. In my opinion, You may not like them for the weird smell or extra hardness.
You can use Snow NonSkid Adhesive spray or Python racquetball anti-slip court shoe spray to make your shoes slip-resistant.
Among these two, the first one is good for an icy surface too.
However, these sprays perform more or less the same. They are applicable for rubber and leather shoes as well.
How Do You Fix Slippery Sneakers?
Sneakers are the most fashionable pair in today’s fashion. As casual wear or semi-formal wear, you can wear sneakers. You will find some sports pairs of sneakers too.
I like to wear sneakers as a stylish outing pair.
Sneakers are rubber soled. It is called sneakers because of their rubber outsole. This rubber is the same as the rubber of a medical tube.
Since the sole is made of rubber, you can treat them like any other rubber-soled shoe. And can increase your sneakers’ grip by following any of the methods I described above. Maybe you can scuff your sneakers as well as scare the shoes. You may use traction spray, rubber pad, bandage, puff paint and so on.
Along with all those methods, you can take another step, especially for sneakers. Ice grip is the solution you can avail of for your sneakers.
I will explain it if the term ‘ice grip’ is new to you.
An ice grip is a case made of rubber specially molded to the size of the sneaker’s outsole. It can provide more traction to your sneakers. It is external, apart from your sneakers. You can get it off if you want.
Above all, if you think any of these solutions is not for you, then simply adopt the resoling option. You will get an almost new pair of shoes by fixing them.
If you want to know more about resoling of sneakers you should go through this article.[ another article link]
Final Note
I assure you that getting non-slip shoes is not that tough. You can make your regular shoes non-slip very quickly.
In your daily lifestyle, You should remember that the slit surface is more prone to slip and can cause serious injuries. So don’t ignore your slippery shoes at any cost.
No matter what, You can apply those methods I explained in this article to your new pair or overused ones. You have just to follow any one of them.
Comment below and let me know which method you liked most and which one actually worked for you.

